1. Separation Parts
パーツごとに別ける

0.
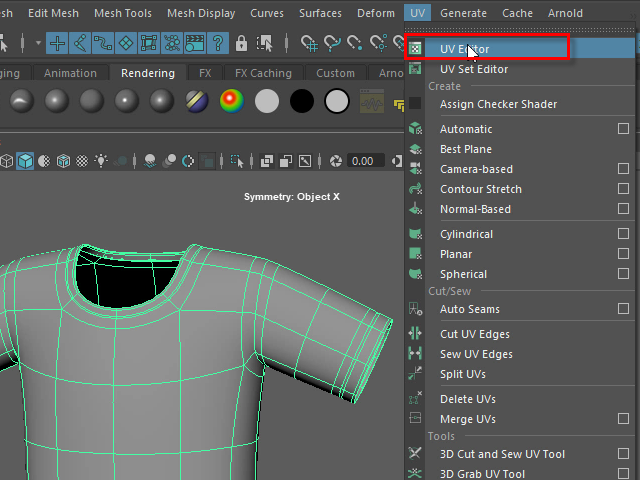
Open UV Editor
服をパーツごとに切り分けてみます。
UV Editor をオープンします。
1.
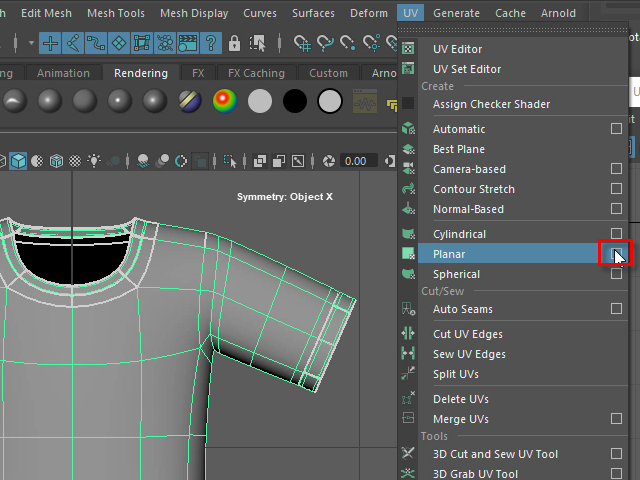
First, apply Planar to make a seamless uv map.
Planar のオプションをオープンします。
Planar はUVマップをカットせずに押しつぶして平面にするツールです。
2.
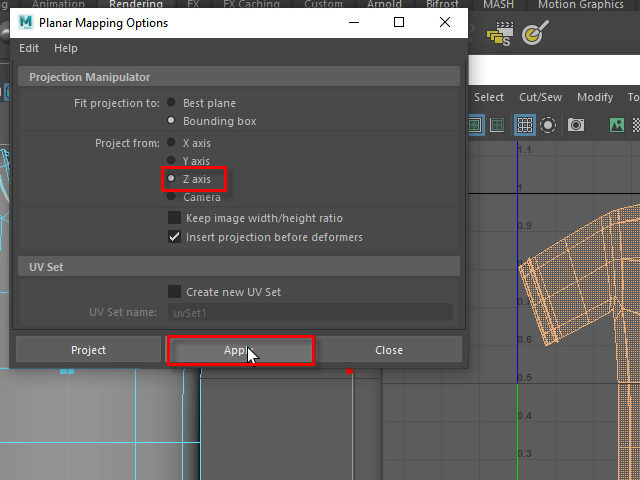
Choose the Z axis. It will project UV map from front view.
正面 ( Front View ) から押しつぶす場合は、Z axis を選択します。
3.
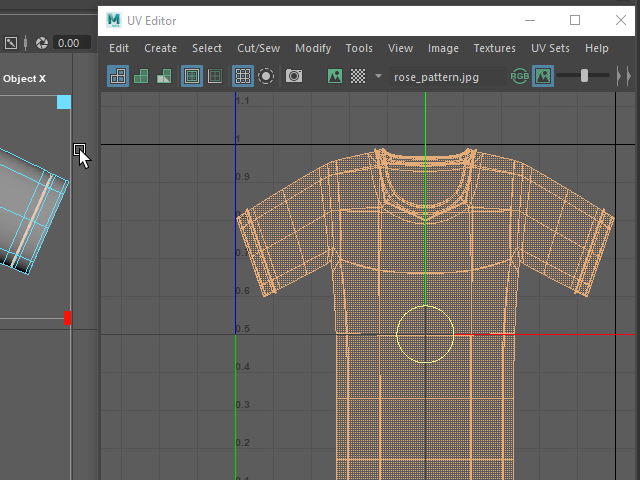
The UV map look like the front view.
このように正面から押しつぶした形になります。
このUV Editor に表示されたワイヤーフレームをUVマップといいます。
4.
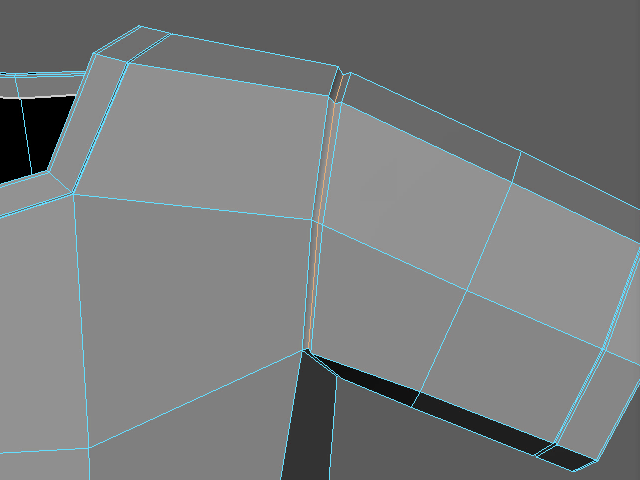
I am going to cut the seams. Select the edge loop like this.
腕や襟(えり)などのUVマップ をカットしてみます。
まず、このようにエッジループをセレクトします。
5.
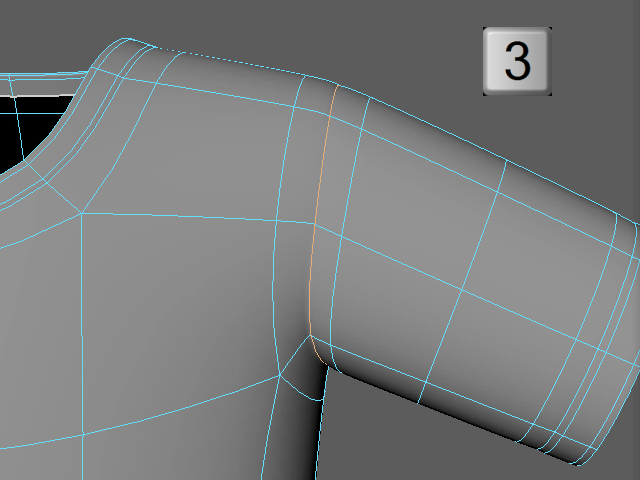
It's easy to select the middle edge loop with subdivision display (Keyboard3).
キーボード 3 で表示するとこのようにエッジの間隔が弘がり、簡単にセレクトできます。
6.
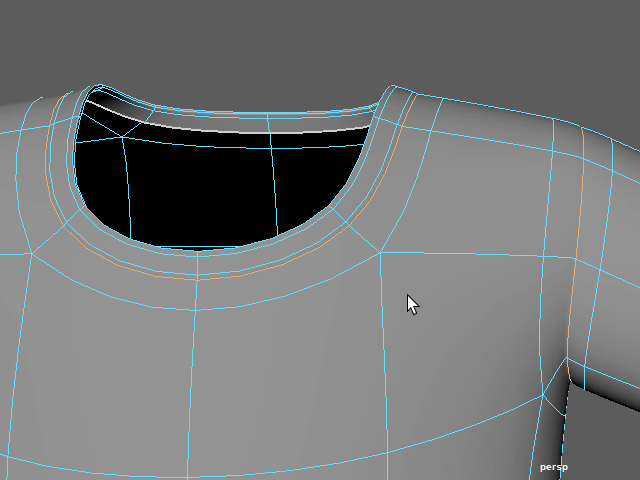
Select the edge loop on the collar.
襟のエッジループもセレクトします。
7.
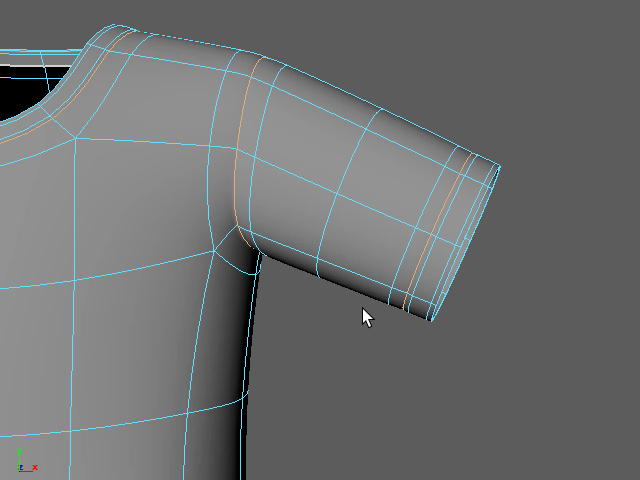
Select the edge loop on the cuff.
袖口のエッジループもセレクトします。
8.
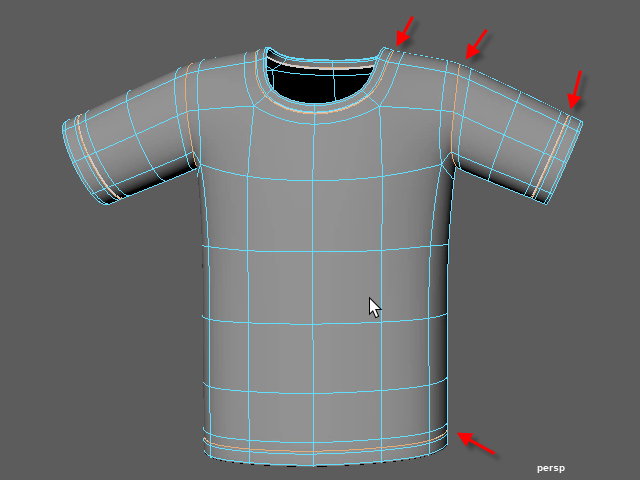
Select the bottom part of the clothes.
シャツの下の部分のエッジループもセレクトします。
9.
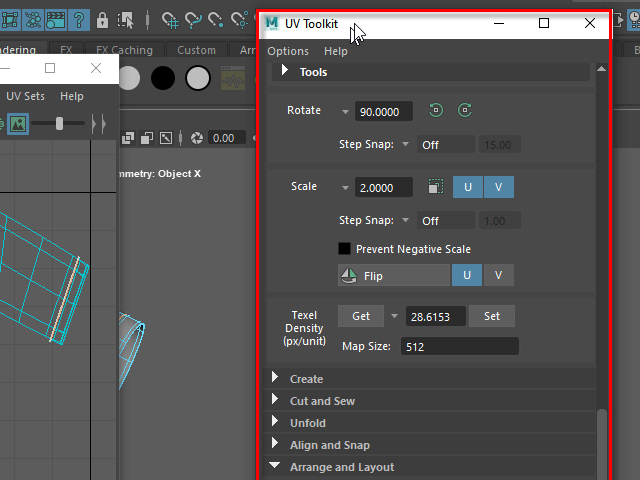
Go to UV Toolkit.
セレクトしたエッジループをカットするには UV Toolkit を使います。
10.

Apply Cut to cut all selected edge loops.
It will cut the UV Map but it won't cut the actual geometry.
Cut ツールでカットします。
この方法だとUVマップをカットしますが、実際の3Dモデルはカットされません。
11.
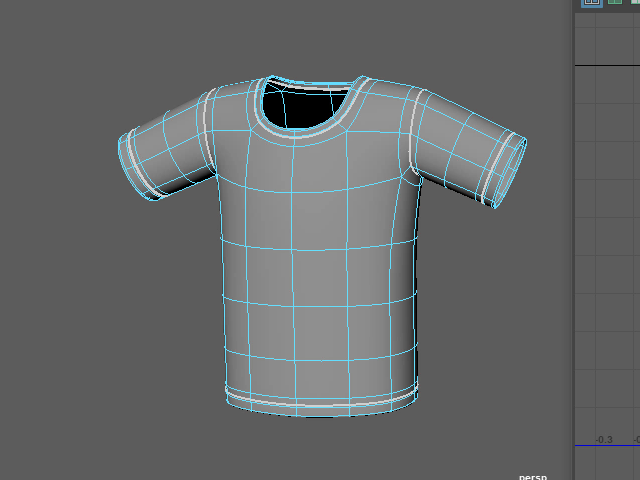
The seam will displayed as white lines.
UVマップがカットされると、このように白い線で表示されます。
ただし実際の3Dモデルはカットされません。
12.

You will see the seams as white lines on UV map.
UVマップもこのようにカットされた部分が白い線で表示されます。
13.
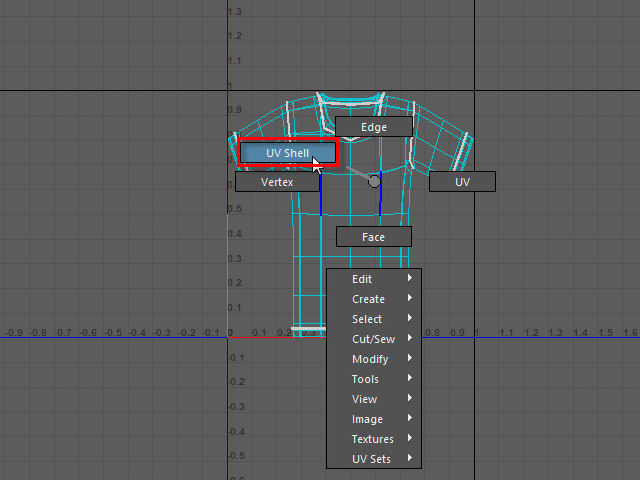
I am going to move each parts.
Select UV Shell.
カットされた各パーツをセレクトし、移動してみます。
右ボタンでUV Shell を選択します。
14.

Click the body. UV shell (faces) will be selected.
Move straight up. Don't move to the side.
If you move to the side, Symmetrize tool won't work later.
ボディーの部分をクリックすると、ボディーの部分(UV Shell )が選択されます。
垂直に移動し、他のパーツと別けます。
真っ直ぐ垂直に移動するのがポイントです。横に移動すると、後で左右対称にするツール(Symmetrize) が使えなくなります。
15.
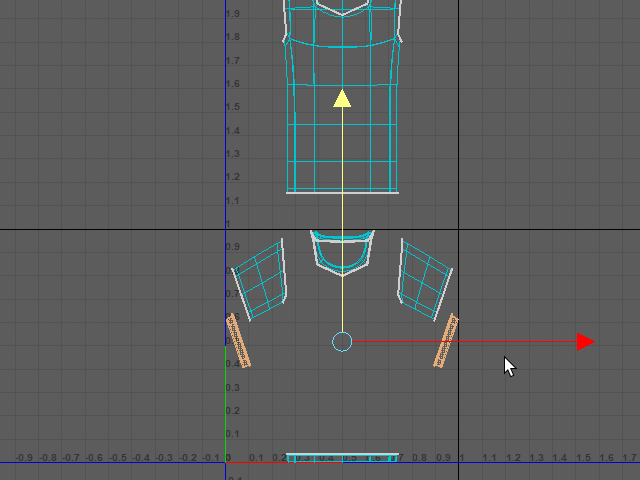
Select the cuffs and move straight down.
袖口のUV Shell を選択し、下に垂直に移動します。
このように各パーツを切り離します。