3. Align Vertical UVs 縦のUVを垂直にする

1.
To make the selected edge loops straight, apply the second icon from the left of Align.
このようにエッジをセレクトし、左から二番目のAlign アイコンでセレクトしたエッジをストレートにします。
2.
Align other edge loops too.
同様に他のエッジループも Align します。
3.

Double click to select an edge loop and hit G to repeat.
キーボード G でリピートします。
4.
For this edge loop, deselect the top edge. Then hit G to apply Align.
このエッジループは一番上のエッジをセレクト解除し、その後 G で Align します。
5.
For the crotch area, spread UV points.
股上のUVが交差している部分は移動して広げます。
6.
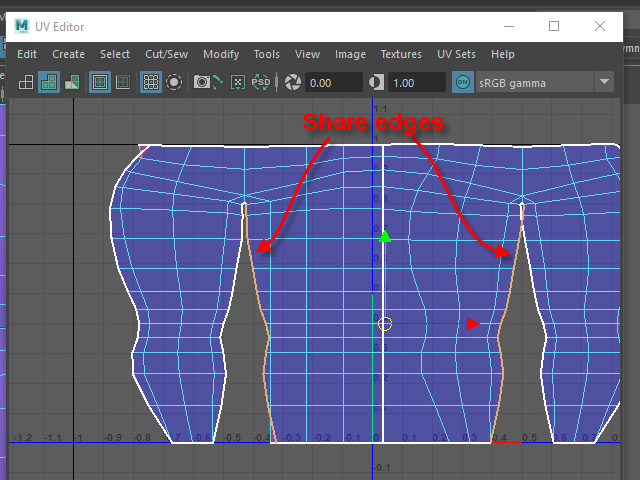
If you select the inside edge loop, the other side of the edge loop is also selected because, these edge loops are the same edge loop in the 3D model.
このつなぎ目のエッジループはズボンの前と後ろで共有するので、このように両方のエッジループがセレクトされてしまいます。
7.
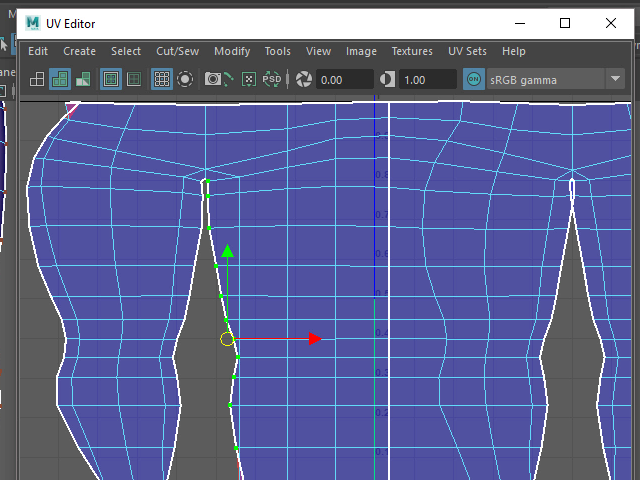
Select UV points instead of the edge loop.
この場合はエッジではなく、このようにUV ポイントをセレクトします。
8.
Apply Align.
Align します。
9.
Do the other side too.
反対側も Align します。
10.
Align the other edge loops too.
他のエッジループも Align します。
11.
The out side edge loops is also share with the other side, so select the UV points instead of the edge loop.
端のエッジループは、これもズボンの前と後ろで共有してしまうので、
このように UV ポイントを Align します。
12.
Align all vertical edge loops like this.
このように縦のエッジをすべて Align します。
13.

Select all UV Points.
UV ポイントをすべてセレクトします。
14.
Apply Layout to fit to the inside of the texture space.
Layout でUV スペース内に納めます。
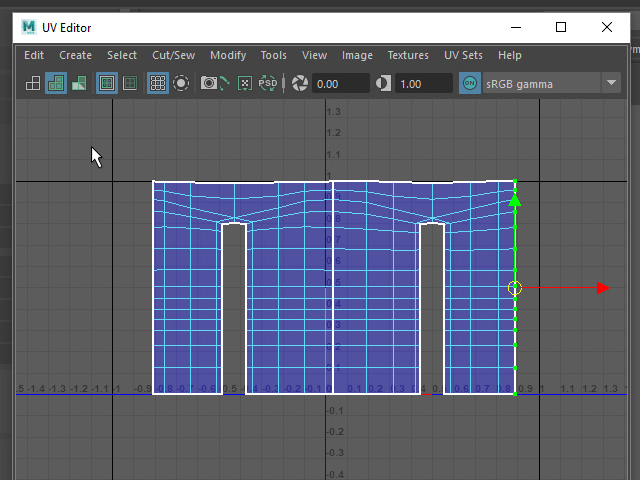
15.
Scale up on Y and fit into the texture space.
縦方向にスケールを大きくし、UV スペース内に納めます。