1. UV Map

1.

Make a sphere for the eyeball.
球体から眼球を作成します。
2.

Rotate 90 on X.
X 方向に90度回転させます。
3.

Freeze Transformations.
4.

Open UV Editor.
5.

This is the default UV map of the sphere.
球体のデフォルトのUVマップはこのようになっています。
6.

I am going to make a different type of UV map.
Go to Planar > Option.
違うタイプのUV マップを作成してみます。
Planar > Option をオープンします。
7.

Select Z axis and apply.
Z axis を選択し、Apply ボタンを押します。
8.
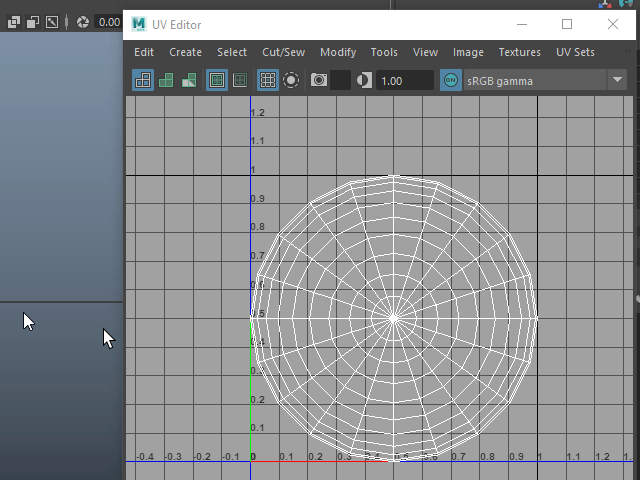
The UV map will be like this.
このような UV マップになります。
9.

I am going to make another UV map for the iris area.
Select faces around the iris area.
瞳の部分に別の UV マップを作成してみます。
まず瞳の部分の面をセレクトします。
10.

Deselect the back faces.
反対側のフェイスをセレクト解除します。
11.

Apply Planer.
Planer を適用します。
12.

A UV map on the Iris area is created and separated from the original UV maps.
瞳の部分のUV マップが新たに作成されて、二つのUV マップに分れました。
13.
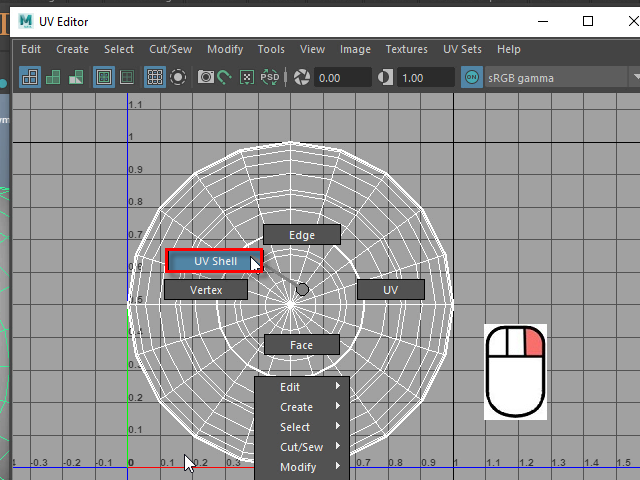
To select each UV maps, select UV Shell.
それぞれの UV マップを選択するには、UV Shell を選択します。
14.
Move the cursor over the UV map and select the UV Shell.
カーソルをUV マップ上で移動し、UV Shell をセレクトします。