2. Ramp Texture
ランプ テクスチャー

1.

With the right mouse button, select UV Shell.
右ボタンで UV Shell を選択します。
2.

Click to select the faces.
クリックすると このように Face が選択されます。
3.

Assign Blinn or aiStandardSurface.
Blinn または、aiStandardSurface を張り付けます。
4.

Rename as blinn_sclera. ( or aiStabdard_sclera)
blinn_sclera と名前を変えます。( または aiStabdard_sclera)
5.

Select the iris.
瞳をセレクトします。
6.

Assign Blinn or aiStandardSurface.
Blinn または、aiStandardSurface を張り付けます。
7.

Rename as blinn_iris. ( or aiStabdard_iris)
blinn_iris と名前を変えます。( または aiStabdard_iris)
8.

Delete history.
History を削除します。
9.

Go to Color option to assign a Ramp texture.
Color のオプションからRamp テクスチャーを張り付けます。
10.

Select Ramp.
Ramp を選択します。
11.

Hit 6 to display the Ramp texture.
キー6でテクスチャーを表示します。
12.

Slide the dot on the bar.
バーの左上にあるドット●を移動してみます。
13.

Change to Circular Ramp.
Circular Ramp に換えます。
14.

To change the color, click the dot first.
色を変えるにはまずバーの上にあるドットをクリックします。
15.

Next, click the color swatch.
次にカラーをクリックします。
16.
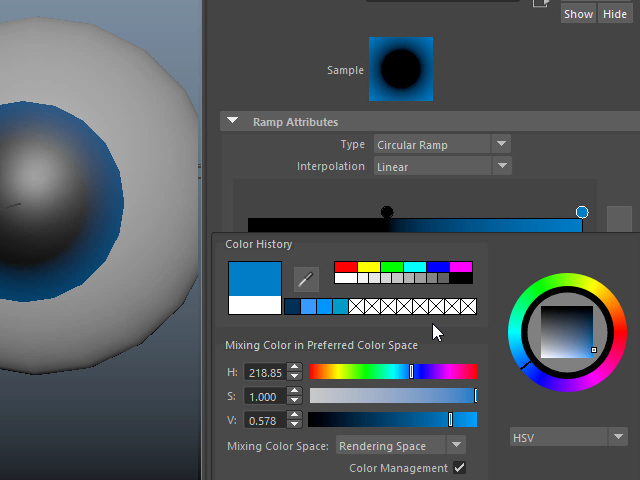
Change the color.
色を変えます。
17.

Move closer the two controllers to get a hard edge.
二つのコントローラーを近づけるとハードエッジになります。
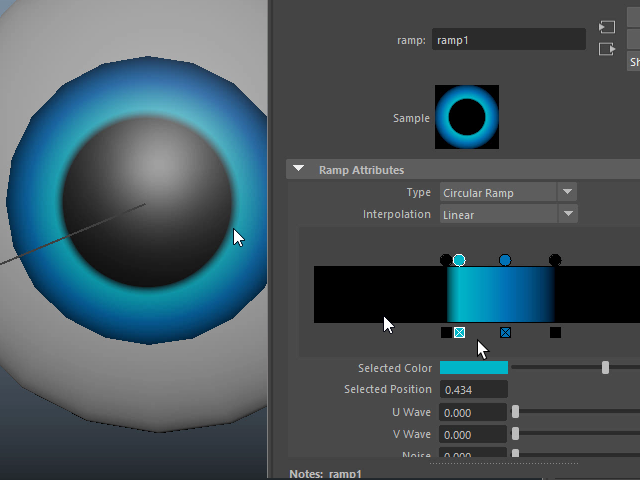
18.

Click the bar to create a new controller.
バーをクリックすると新たにコントローラーが作成されます。
19.

Just click to make new controllers.
クリックするだけでコントローラーが作成されます。
20.

To delete controllers, just click the little square under the bar.
コントローラーを削除するには、バーの下にある四角をクリックします。
21.

Click to change the color.
クリックし、色を変えます。
22.

Make it dark.
色を濃くします。
23.

Adjust the position.
位置を調節します。
24.
Put a different color around the pupil as you like.
瞳孔の回りに少し違う色を入れてみるとこうなります。
25.

Adjust the pupil size depending on your character.
To make a cute character, make a big pupil.
瞳孔の大きさを調節します。
一般に可愛いキャラクターの場合は瞳孔を大きく作ります。