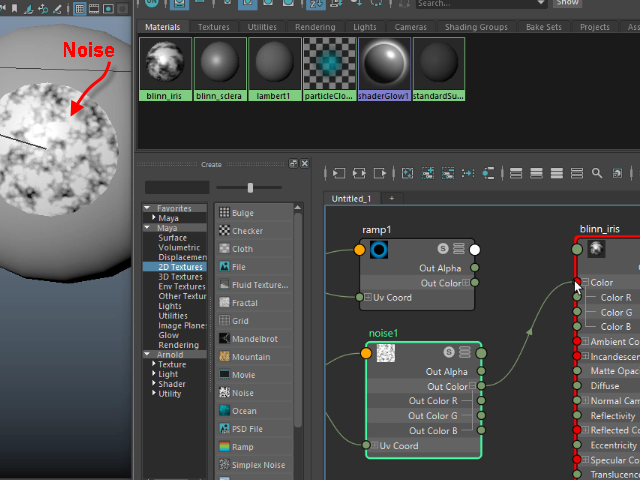
3. Layered Texture

1.
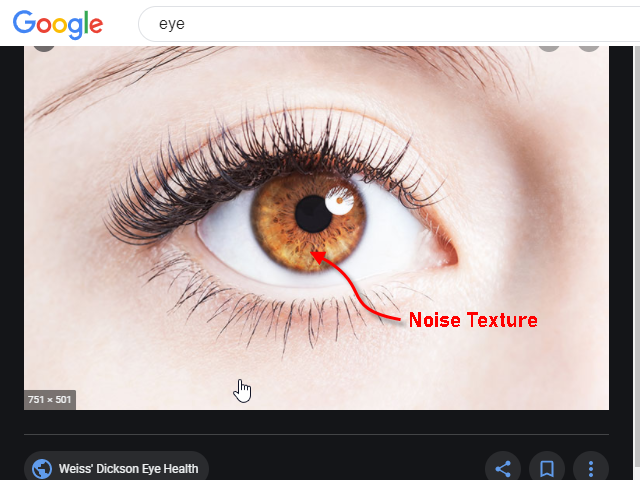
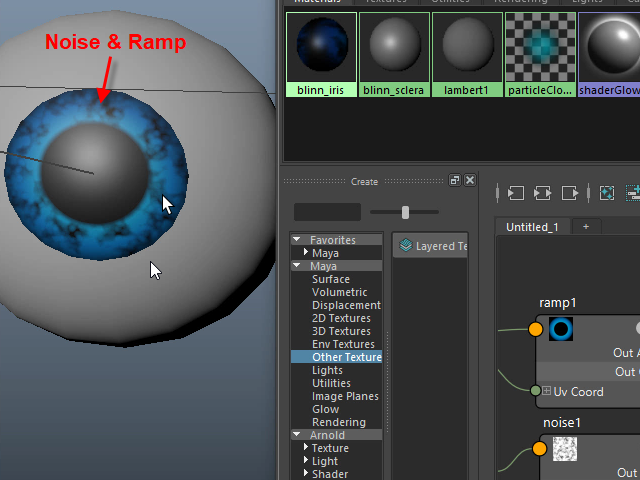
I am going to make the texture in the eye using Noise texture.
目のテクスチャーをNoise テクスチャーで制作してみます。
2.
Open Hypershade.
Hypershade をオープンします。
3.
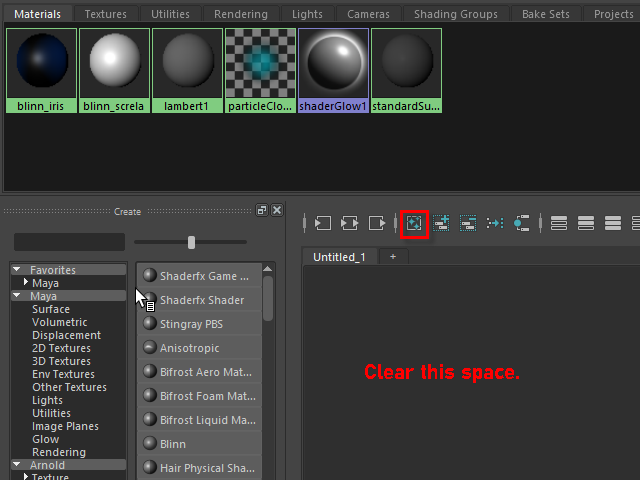
Click the icon to clear the working space.
このアイコンをクリックし、ワークスペースをクリアにします。
4.
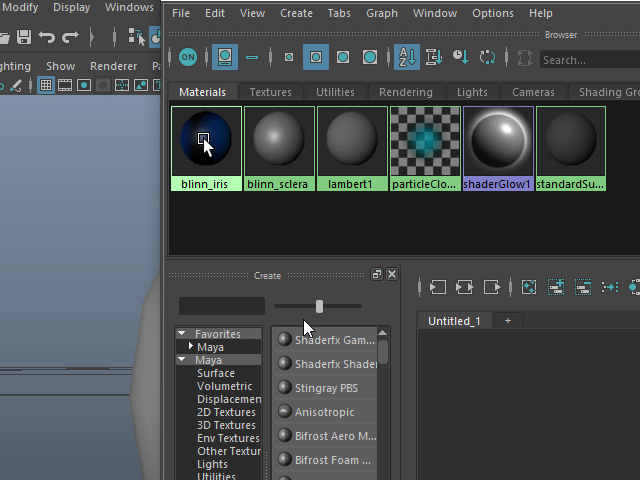
Move the cursor over blinn_iris.
blinn_iris の上にカーソルを移動します。
5.
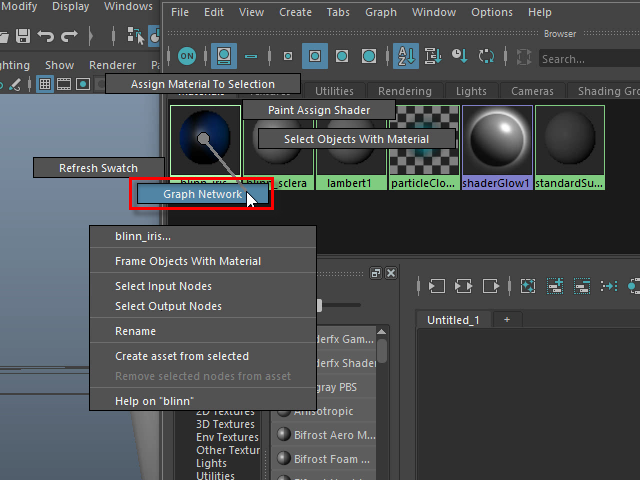
With the right mouse button, select Graph Network.
マウス右で Graph Network を選択します。
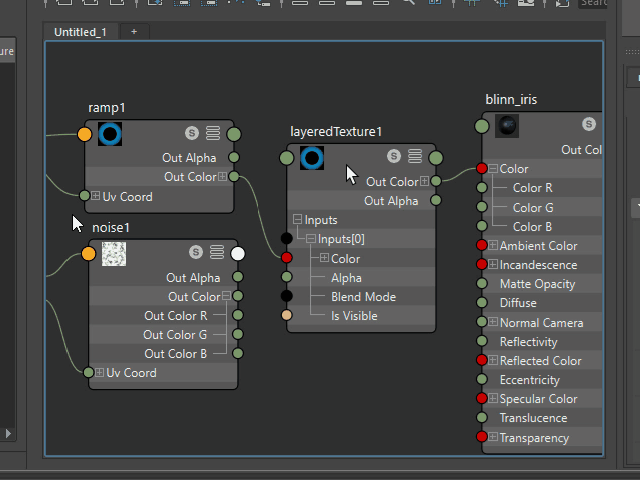
6.
This is the Graph Network.
このようにGraph Network が表示されます。
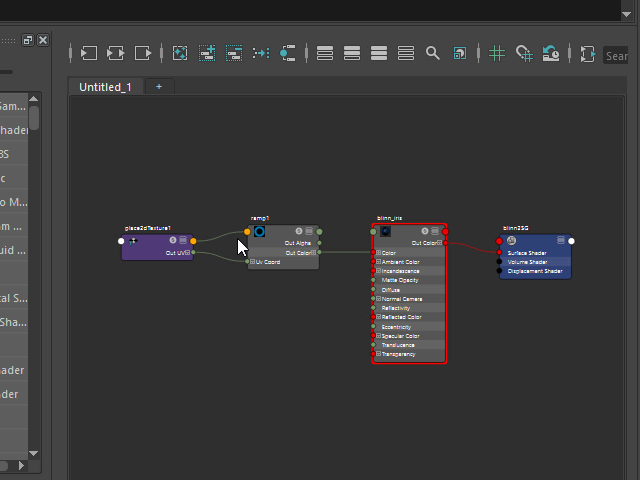
7.
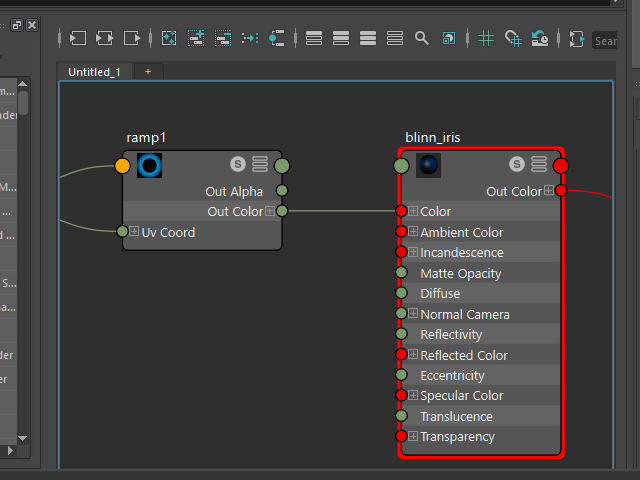
Zoom in to Ramp1 and blinn_iris.
Ramp1 と blinn_iris にズームインします。
8.
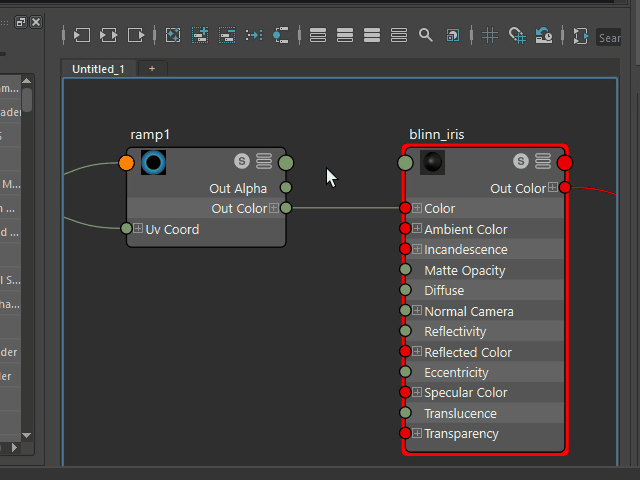
Select the connector.
コネクターをセレクトします。
9.
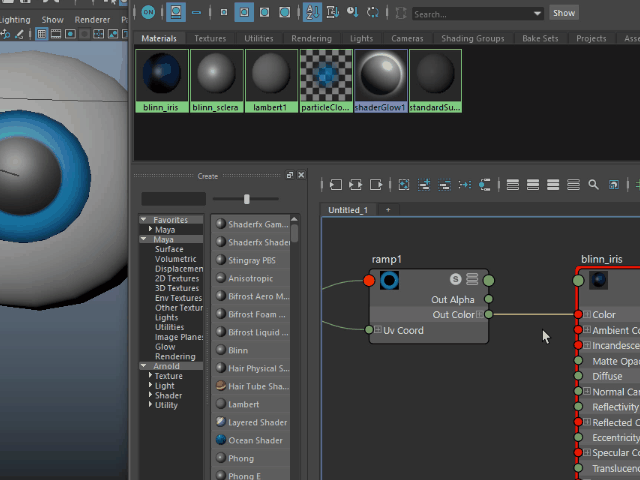
Delete to disconnect the ramp texture.
削除すると、ramp テクスチャーが切断されます。
10.
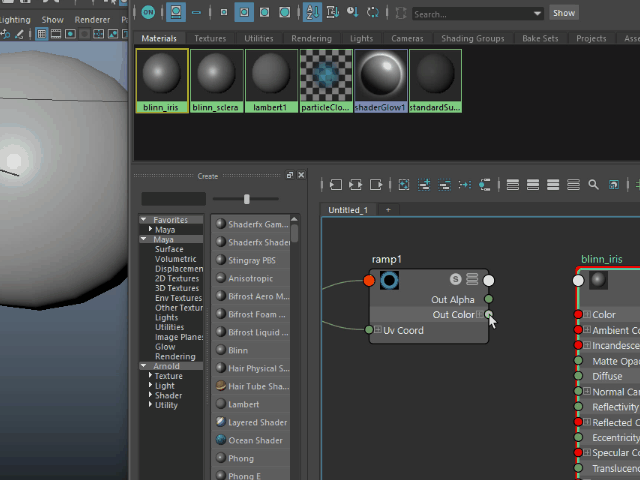
Connect again.
もう一度 繋いでみます。
11.
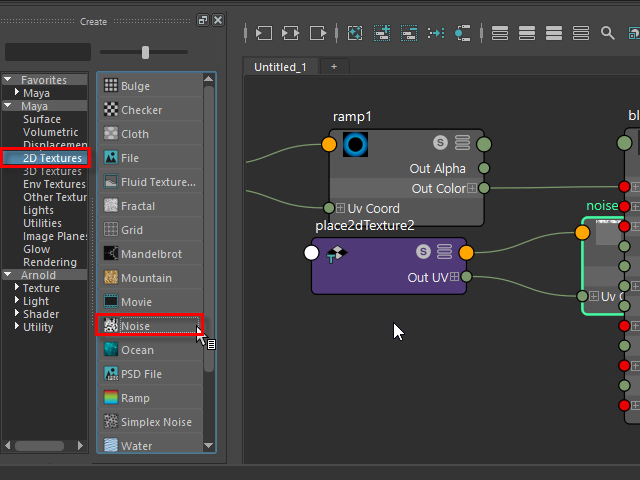
Click Noise texture to open.
Noise テクスチャーをクリックし、オープンします。
12.
Relocate the noise texture.
noise テクスチャーを移動します。
13.
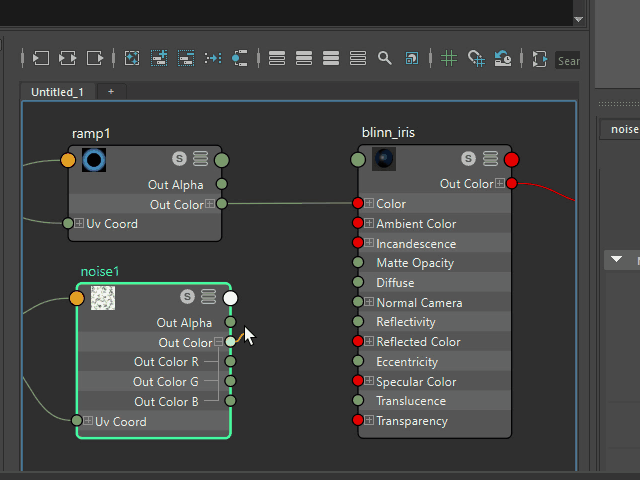
Connect the noise texture.
noise テクスチャーを接続してみます。
14.
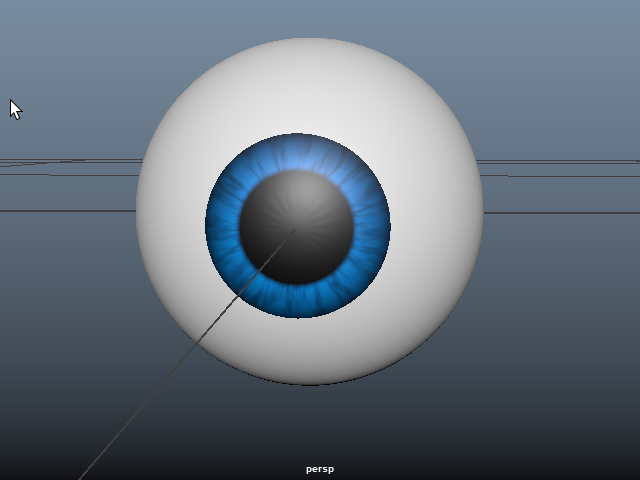
Now, the noise texture is displayed on the eyeball.
このようにnoise のテクスチャーが眼球に表示されます。
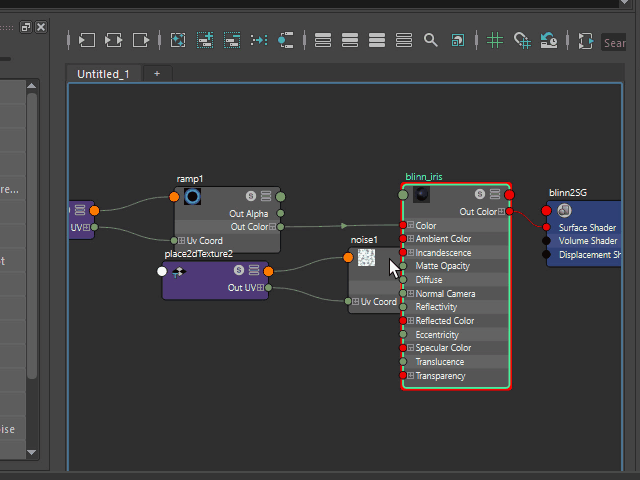
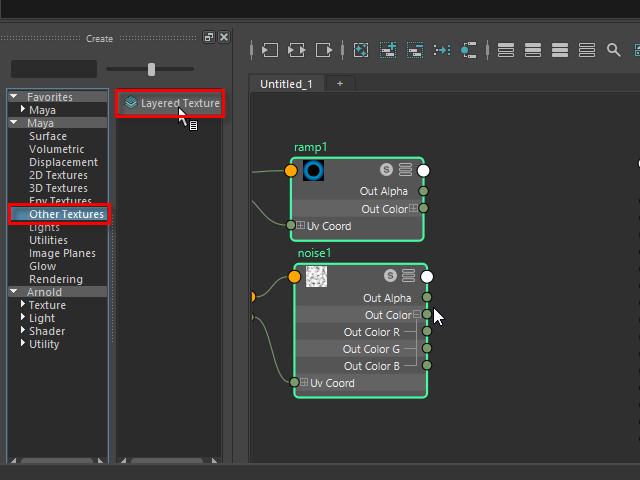
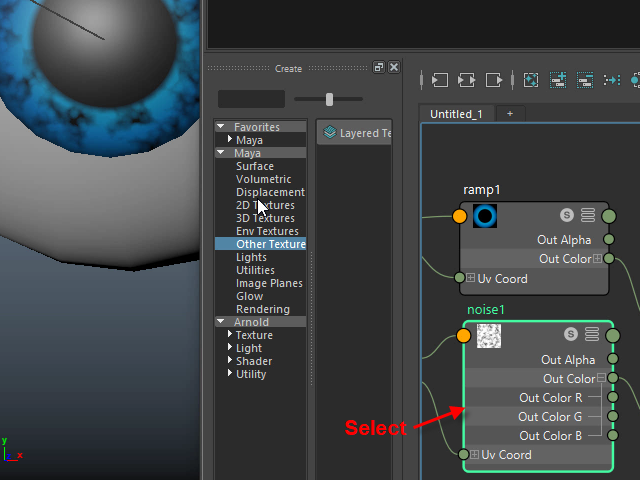
15.
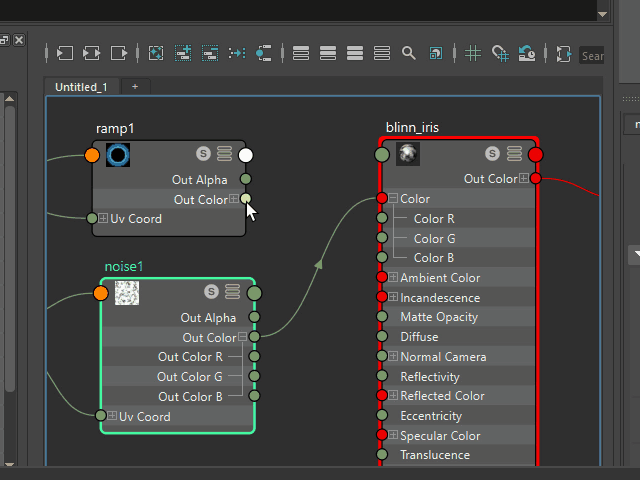
You can not connect both ramp1 and noise1 at the same time.
ramp1 と noise1 を同時にコネクトすることはできません。
16.
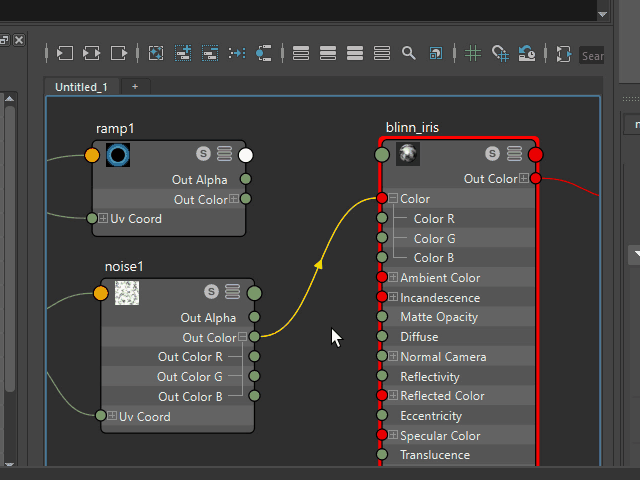
To connect both ramp1 and noise1 at the same time,
I need a utility called Layered Texture.
ramp1 と noise1 を同時に接続するには、
Layered Texture というユーティリティーを使用します。
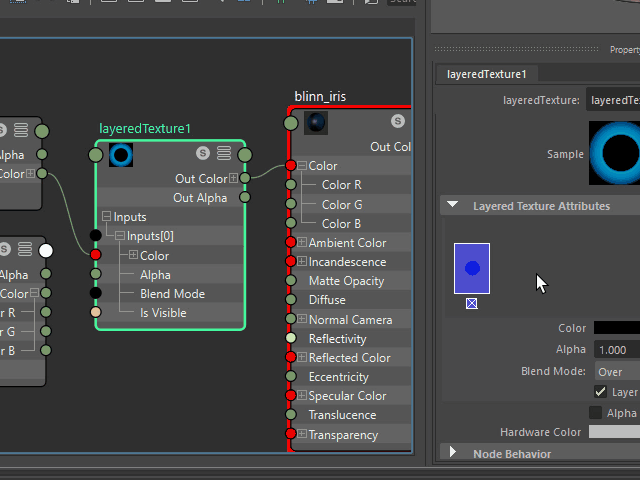
17.
Click and bring Layered Texture.
Layered Texture をクリックしオープンします。
18.
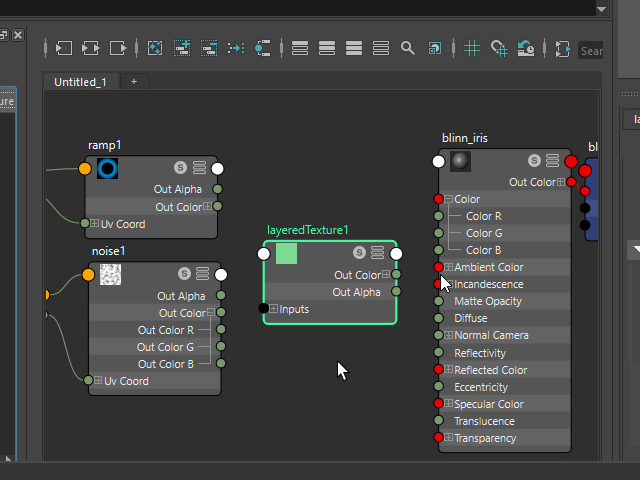
Relocate like this.
このように配置します。
19.
Click Inputs channel and open.
Inputs チャンネルをクリックしオープンします。
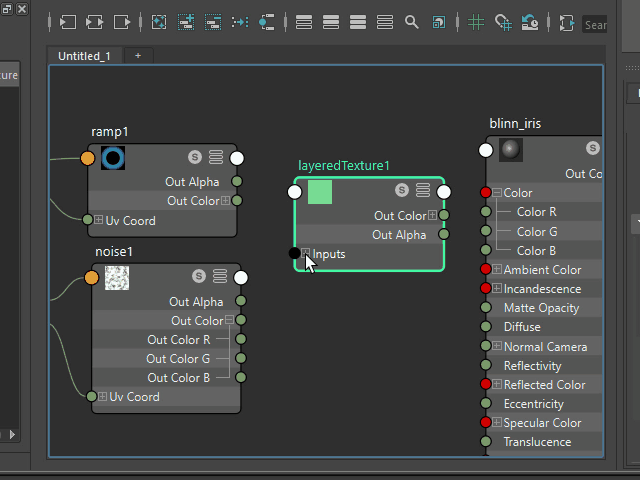
20.
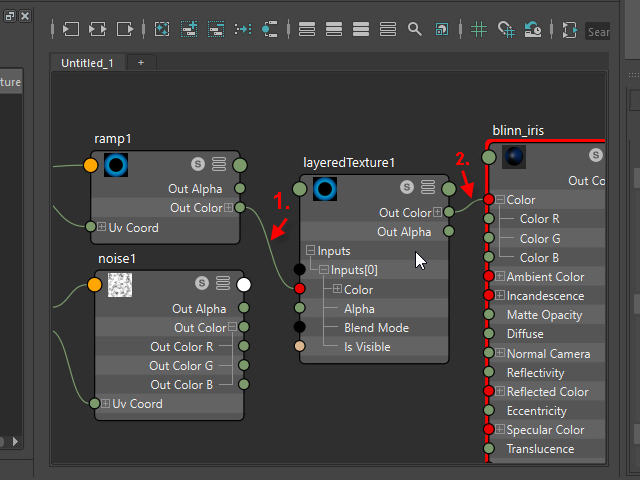
1. Connect ramp1 to layeredTexture1.
2. Then, connect layeredTexture1 to blinn_iris.
1. ramp1 を layeredTexture1 に接続します。
2. 次に、layeredTexture1 から blinn_iris につなげます。
21.
To connect the noise1 to layeredTexture1,
I need to create a new Input channel first.
Click to select layeredTexture1.
noise1 を layeredTexture1 に繋げるには、
まず新たに Input チャンネルを作成します。
layeredTexture1 をクリックしセレクトします。
22.
Click the attribute editor like this.
It will create a new Input channel.
このように attribute editor をクリックすると、
新たに Input チャンネルが作成されます。
23.
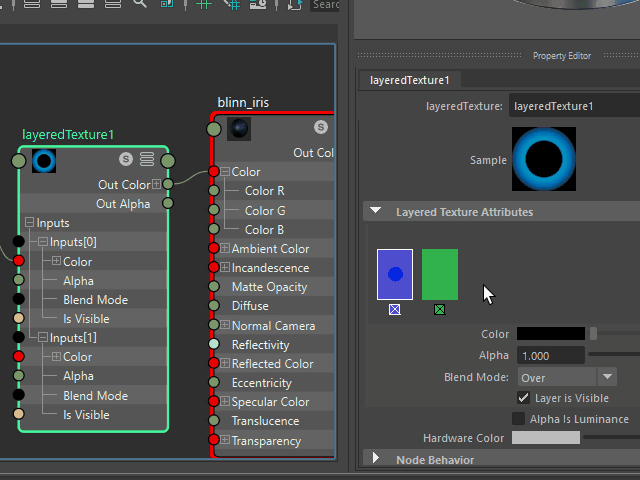
You can make as many as you want.
このように複数作成することもできます。
24.
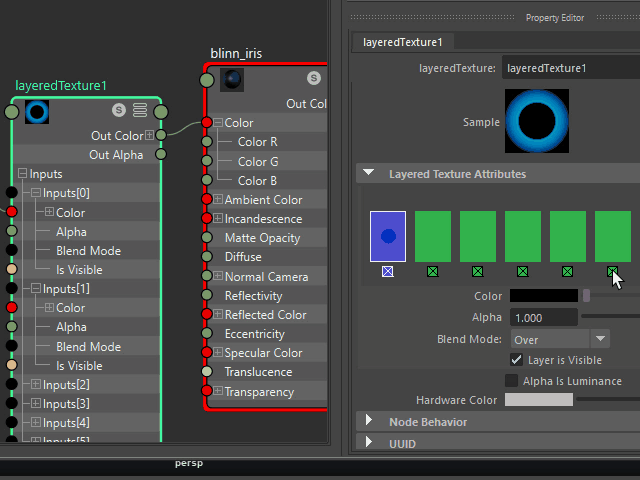
To delete channels, click the little square on the bottom.
In this case, just add one Input channel.
削除する場合は、下にある小さな四角をクリックします。
ここでは Input チャンネルを一つだけ追加します。
25.
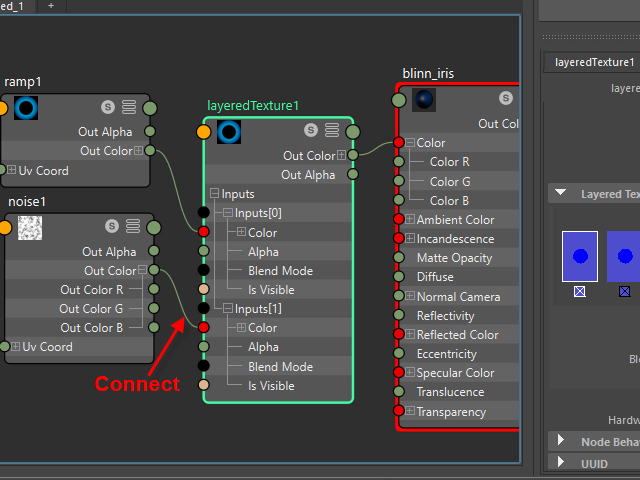
Connect noise1.
noise1 を繋ぎます。
26.
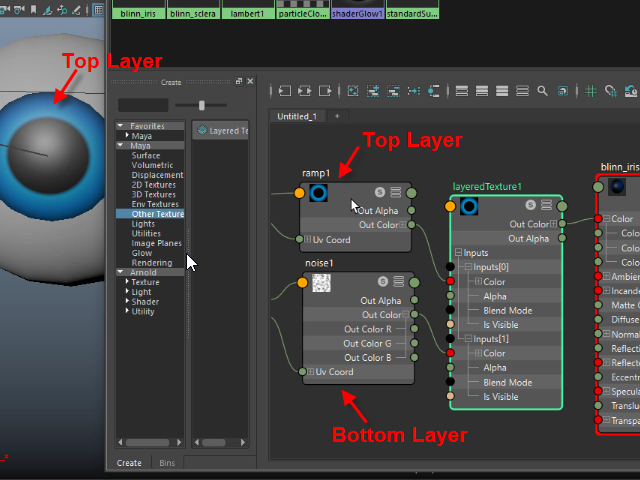
It shows only the top layer.
このように上のレイヤー (Top Layer) だけが表示されます。
27.
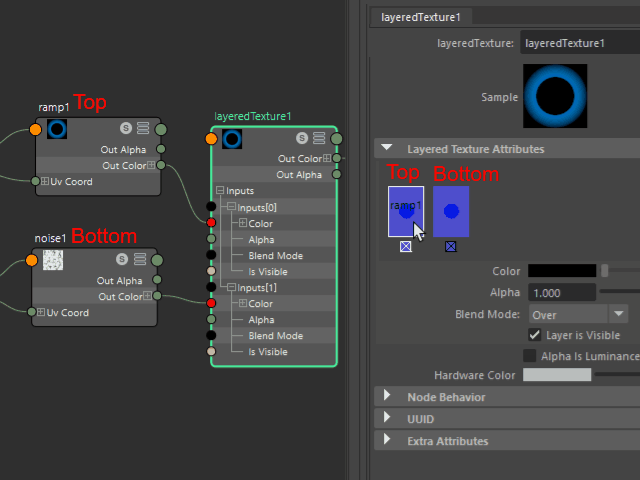
The top layer have to be semitransparent
Select ramp1 from Layered Texture Attributes.
Top レイヤーを半透明にしてみます。
右の Layered Texture Attributes から ramp1 をセレクトします。
28.
Change to Multiply.
Multiply に替えます
29.
Now you can see through the bottom layer.
このように下のレイヤー noise1 が表示されます。
30.
To change the noise pattern, select the noise1.
ノイズのパターンを変えるには、まずnoise1 をセレクトします。
31.
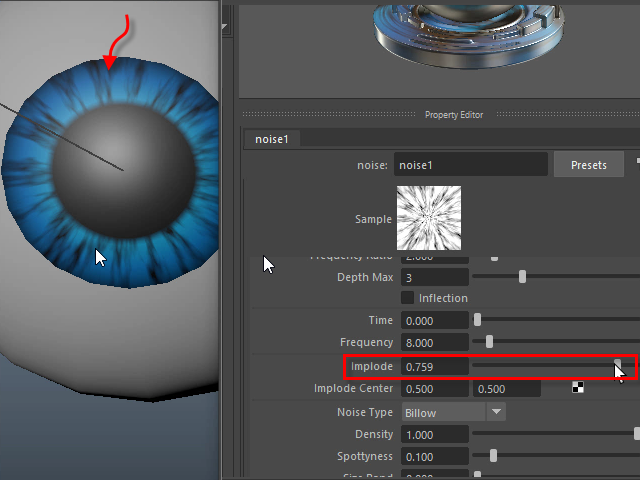
Adjust Implode.
Implode を調節します。
32.
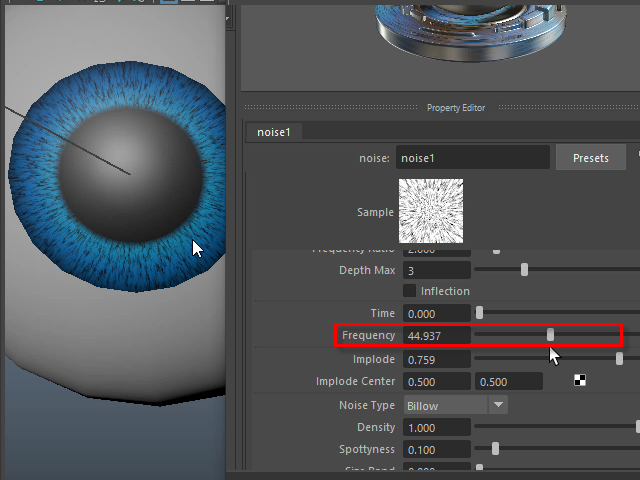
Adjust the size with Frequency.
Frequency で大きさを調節します。
33.
It's going to be like this.
このようになります。