____________________________________________________
How to Make Multi-Curves
____________________________________________________
0.
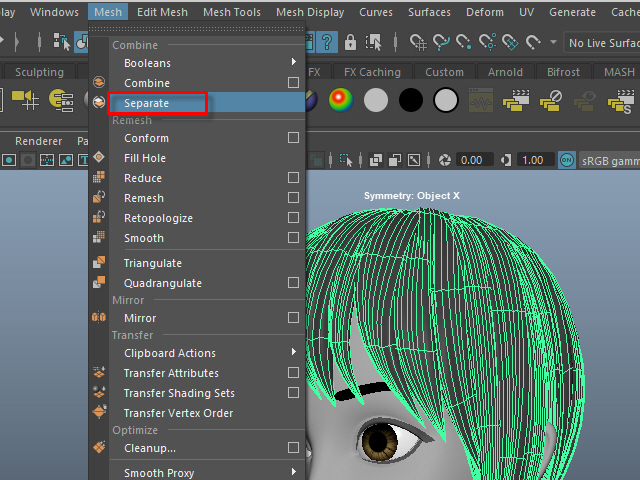
If the hair is combined, separate them.
もし髪全体がCombine されてる場合は、Separate で分けます。
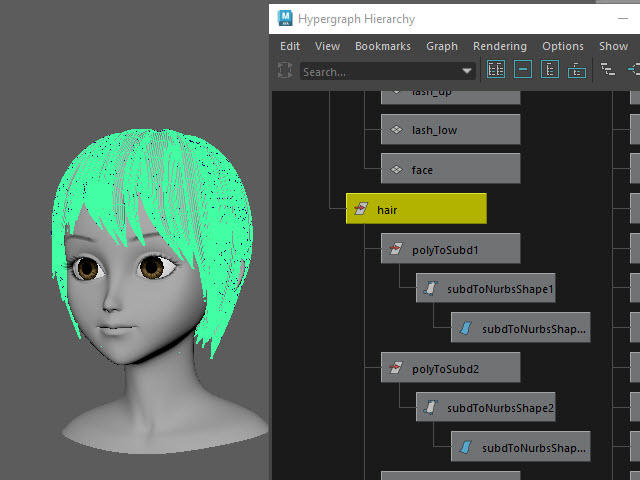
1.
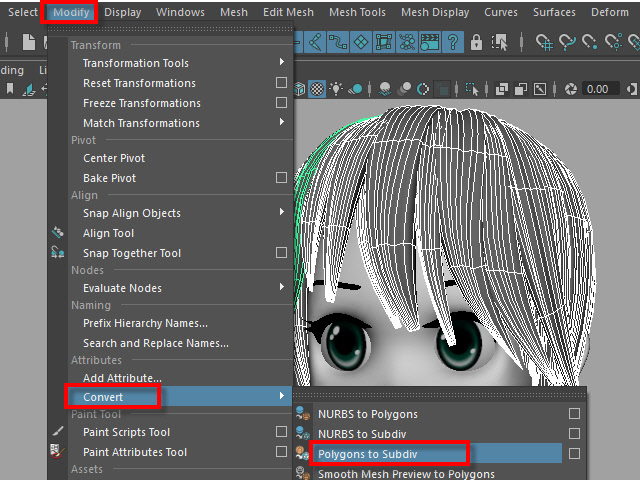
To extract curves from polygon, first convert to Subdiv.
髪をセレクトし、Subdiv に変換します。
2.
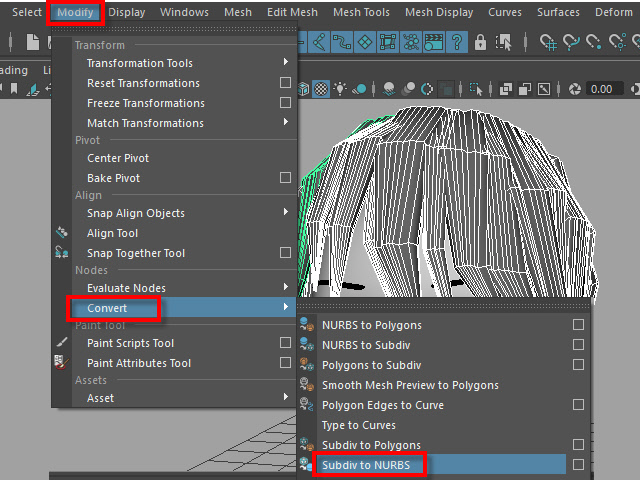
Then, convert to NURBS.
次に、Subdiv から NURBS に変換します。
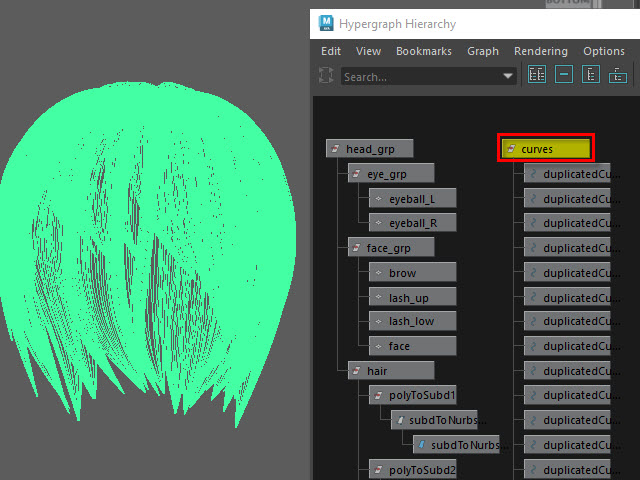
3.
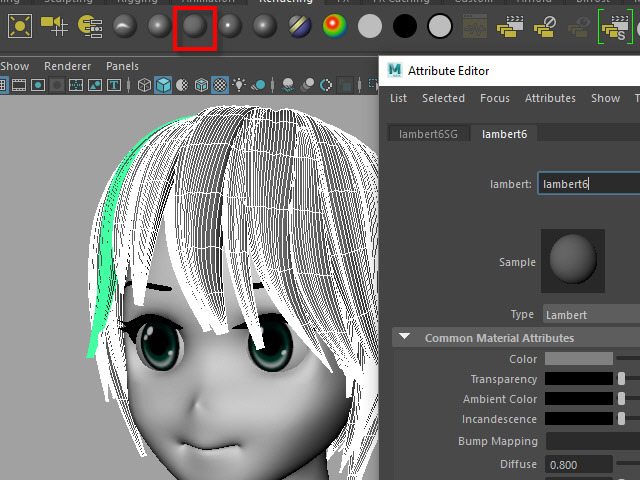
If the hair turned into solid green, there is no shader assigned.
Assign a new shader if there is no shader on the surfaces.
NURBS に変換すると、色がグリーンになります。
これはシェイダーが張り付いてない状態です。
新た に シェイダーを張り付けます。
4a.
Select the all nurb hairs and hit 1 before extracting curves at the next step.
次のステップでカーブを抽出する前にキー1で表示します。
4b.

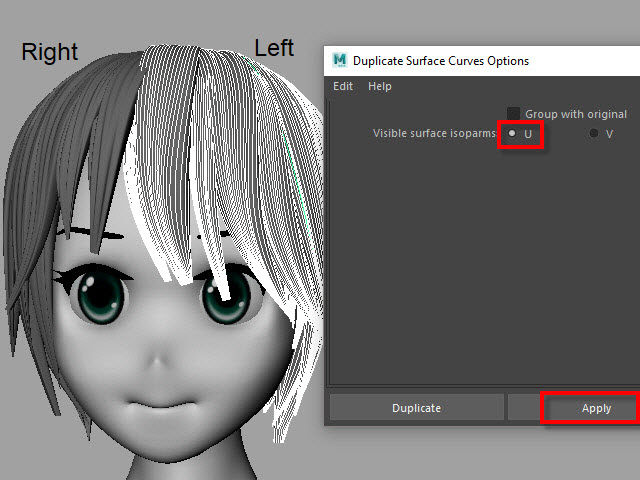
To extract curves, go to Duplicate Surface Curves > Option
Make sure the nurb hairs are displayed with key1.
If you displayed with key3, they will create too meny curves.
次に、カーブを抽出してみます。
まず髪をセレクトし、Duplicate Surface Curves のオプションをオープンします。
キー1で表示されていることを確認します。
キー3で表示すると 必要以上にカーブが複製されてしまいます。
5.
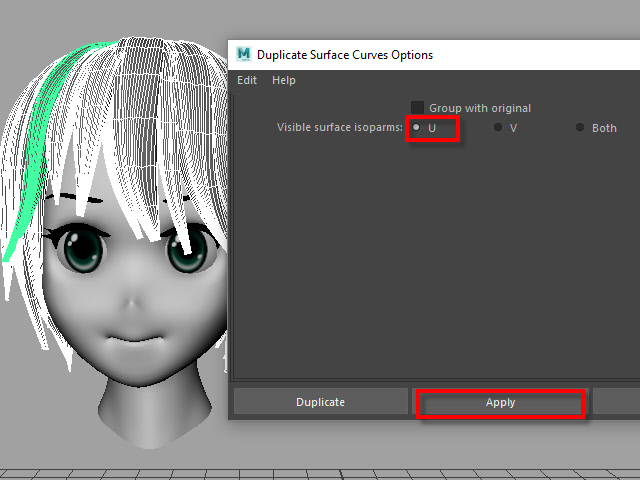
Select U direction and apply.
U 方向に抽出してみます。
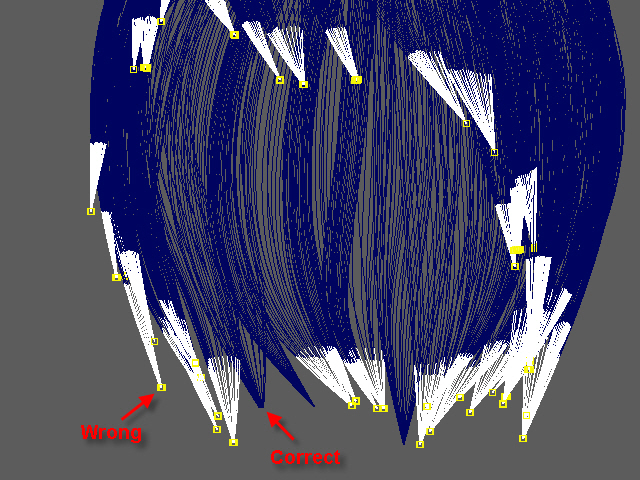
6.
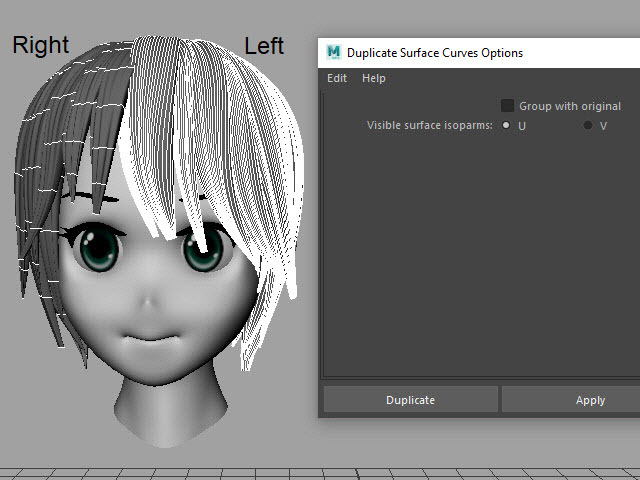
The right side hairs are wrong direction.
It happens when you duplicate and flip the hair tubes.
白くなっている部分が抽出されたカーブですが、このように、右と左で方向が違う場合があります。これは最初に円柱で髪を制作した時に、片側の髪を制作し、それを反転したために起こる現象です。
7.
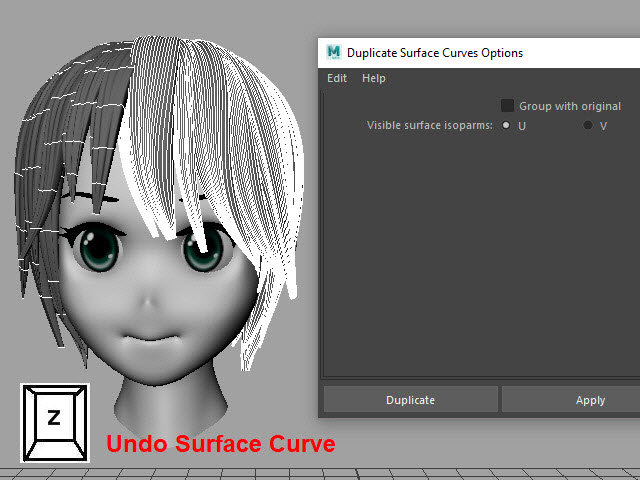
Undo
まずUndo で取り消し、右側と左側を分けて別々に抽出してみます。
8.
Select the left side hairs and apply.
まず左側 (Left ) の髪をセレクトし、U方向に抽出します。
9.

Now, select the right side hairs. Change to V direction and apply.
次に右側をセレクトし、V 方向に抽出します。
10.
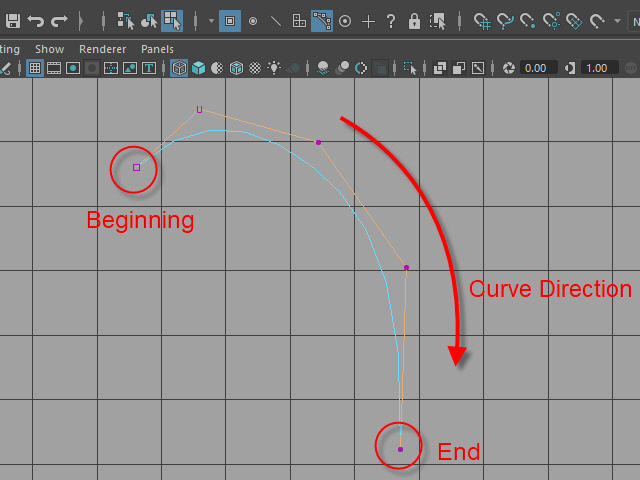
A curve has a direction.
Make sure the square dot is the beginning of the curve.
Before applying nHair on the curves, all curves directions need to be checked.
カーブの方向性について
カーブにはこのように方向があります。
カーブの起点は四角いバーテックスになっています。
このカーブの方向を間違うとnHair がうまく作成されません。
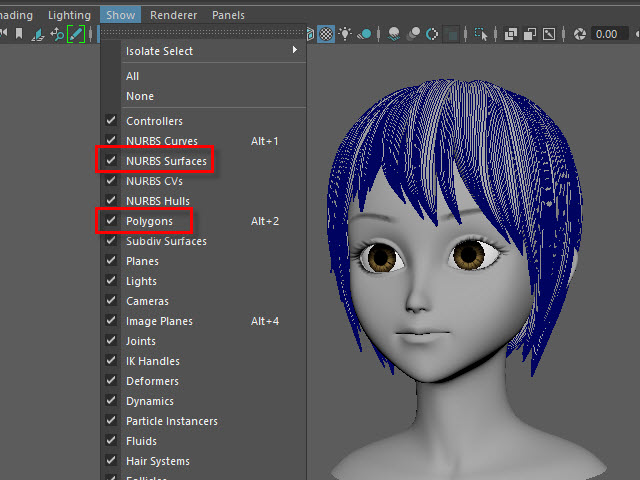
11.
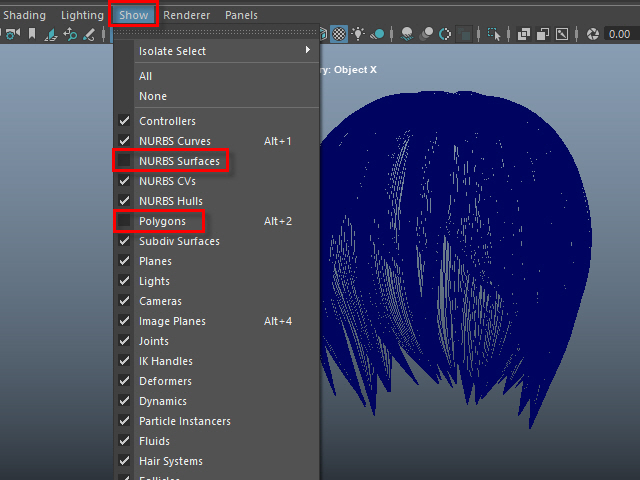
Hide NURBS Surfaces and Polygons.
NURBS Surfaces と Polygons を非表示にします。
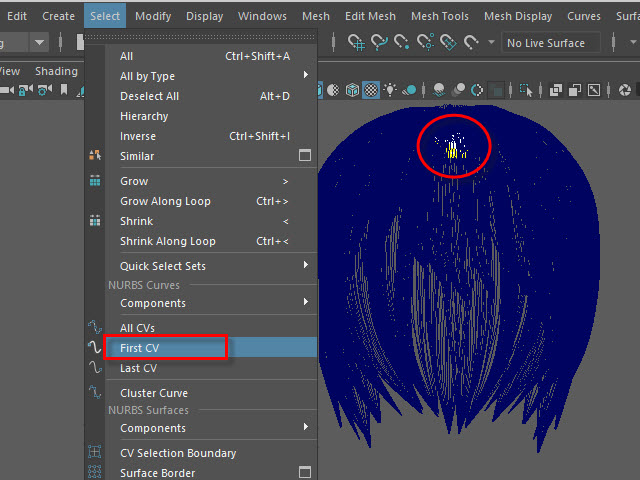
12.
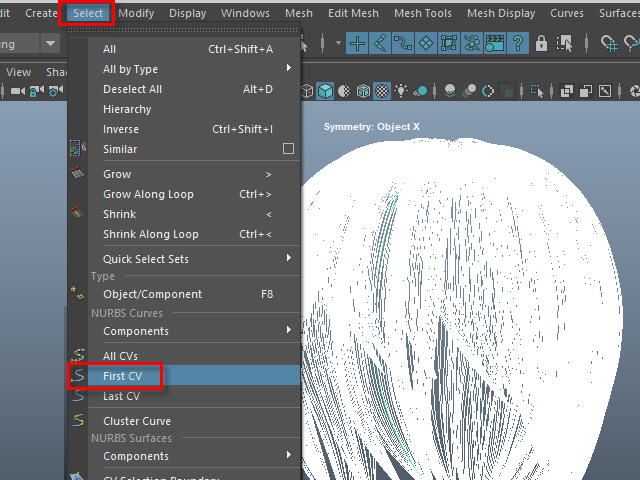
Select all curves and apply First CV.
カーブをすべてセレクトし、First CV をクリックします。
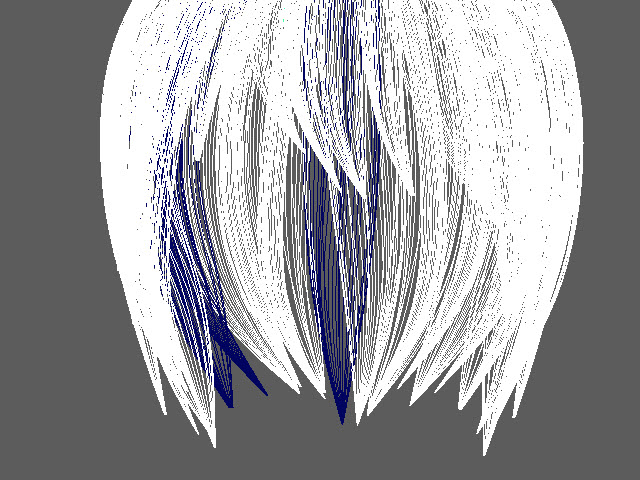
13.
The first square CVs will be displayed.
If you see the square CVs on tip of the hair, they need to be reversed direction.
If the square CVs are gray, turn off Symmetry.
このように四角いCVが表示されます。
毛先に四角いCVが表示されている場合は、カーブの向きを反転します。
四角いCVがグレー色で表示される場合は左右対称(Symmetry)を off にします。
14.
Select all curves which are the wrong direction.
向きが逆になっているカーブをすべてセレクトします。
15.

Apply Reverse Direction.
Reverse Direction でカーブの向きを反転します。
16.
Apply First CV again and make sure all directions are correct.
もう一度 First CV を適用し、カーブの向きを確認します。
17.
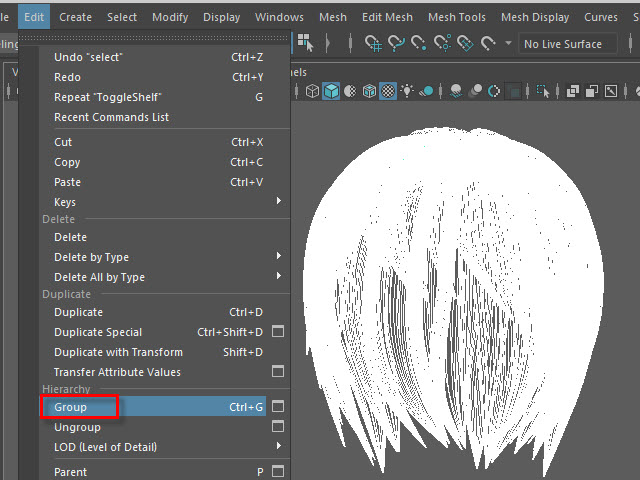
Select all curves and Group them.
すべてのカーブをセレクトし、グループ化します。
18.
Rename it.
名前を変更します。
19.
Display everything.
表示を元にもどします。
20.
You don't need the hair tubes anymore.
Hide or delete them.
ヘアーチューブはこれ以上必要ないので、削除するか、または非表示にします。
21.
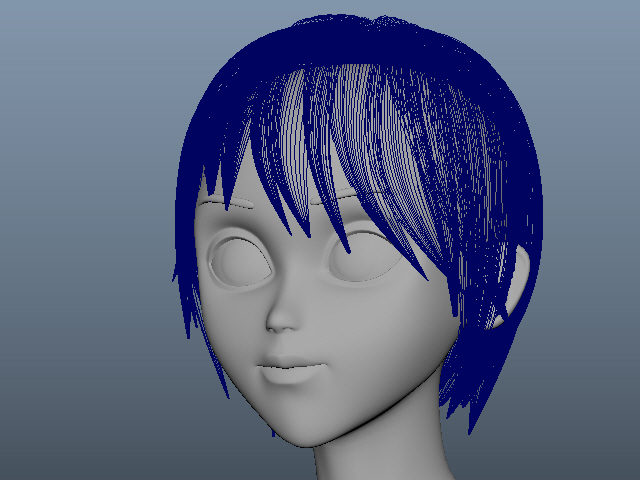 Now it is ready to apply Maya nHair.
このようにカーブを作成した後に、次に nHair を制作します。